Embark on a flavorful journey beyond taste, capturing the essence of culinary artistry through the lens of your camera. Food photography while traveling is more than just snapping pictures; it's about preserving cultural stories, evoking sensory memories, and sharing the soul of a place, one delicious image at a time.
Unlocking Culinary Stories Through Your Lens
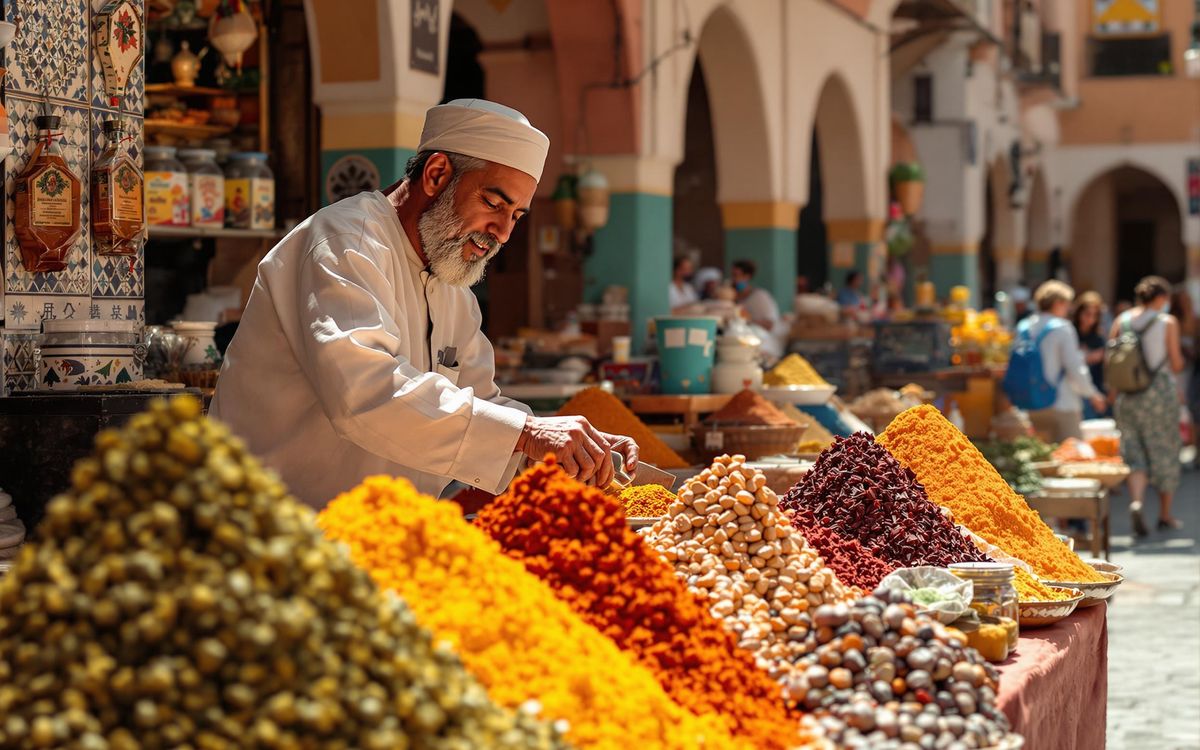
Travel oadens the palate and the perspective, and what better way to immortalize these experiences than through captivating food photography? Forget mundane snapshots; aim to capture the narrative behind each dish, the cultural significance woven into every ingredient, and the palpable atmosphere of the setting. Imagine, for instance, the labyrinthine souks of Marrakech, where pyramids of viant spices rise like chromatic sculptures. A well-composed photograph can convey not just their visual appeal, but also their pungent aromas and the bustling energy of the marketplace. Or consider the time-honored tradition of pasta making in Bologna, where nimble hands transform humble flour and eggs into culinary masterpieces. Capturing the artistry of this process, the delicate dance of the dough, and the pride in the artisan's eyes, tells a story far richer than any guidebook could convey. Food, in its preparation and presentation, offers a unique window into the heart of a culture.
The goal is to transport your viewers, allowing them to almost taste the dish, feel the warmth of the sun on their skin, and hear the murmur of conversations around them. Think beyond the plate itself. Consider the context: the weathered hands of a street vendor in Hanoi expertly assembling a bánh mì, the sun-drenched vineyards of Tuscany providing the backdrop for a rustic farmhouse lunch, or the intricate tilework of a Lisbon cafe serving as a canvas for a pastel de nata. These details elevate your food photography from mere documentation to immersive storytelling. Remember, each image is a portal, a chance to share not just what you ate, but what you experienced. It's about capturing the essence of a place, its people, and its traditions, all through the universal language of food.
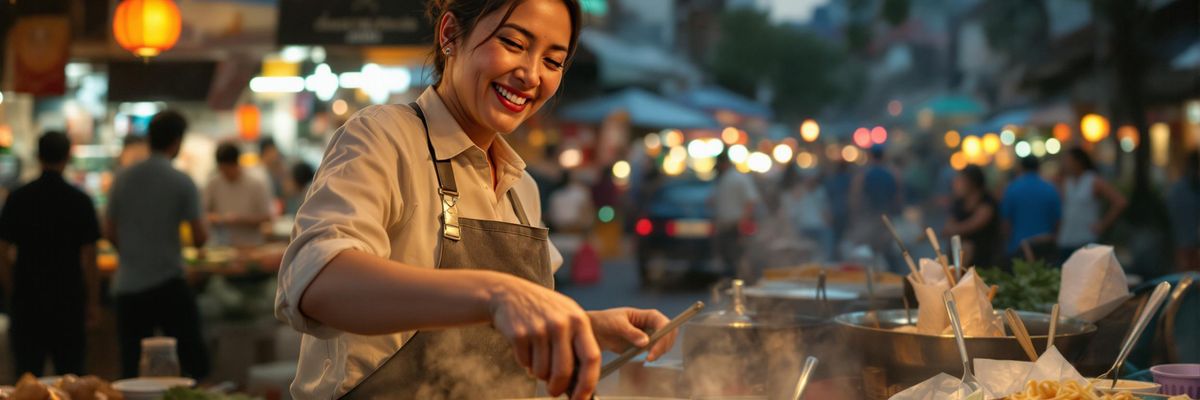
Food photography becomes a powerful tool for preserving travel memories. Years later, as you scroll through your images, you'll be instantly transported back to that tiny trattoria in Rome, the aroma of truffles filling your senses, or the viant street food stall in Bangkok, the fiery spices tingling on your tongue. These aren't just pictures; they're time capsules, encapsulating moments of joy, discovery, and connection. They are visual diaries, filled with the flavors and textures of your adventures, ready to be relived and shared with others. Emace the opportunity to capture these culinary stories, and you'll find that your travel memories become richer, deeper, and far more delicious.

Harnessing Natural Light's Delicious Glow
Natural light is the food photographer's best friend, capable of transforming an ordinary dish into a culinary masterpiece. Mastering the art of harnessing natural light is crucial for achieving viant, appetizing, and authentic-looking food photos. The key is to understand how light interacts with your subject and to position yourself accordingly.
When shooting indoors, whether in a restaurant or a market, seek out the best natural light source u2013 typically a window. Position your food near the window, ideally to the side, allowing the light to gently illuminate the dish. Avoid direct sunlight, which can create harsh shadows and wash out colors. Overcast days are often ideal, as they provide a soft, diffused light that evenly illuminates your subject. Pay attention to the direction of the light and adjust your position to minimize shadows and highlight textures. If the light is too strong, consider using a sheer curtain or a white cloth to diffuse it further.
Outdoor food photography offers a different set of opportunities and challenges. The golden hour, the period shortly after sunrise and before sunset, is renowned for its warm, soft light, which is incredibly flattering for food. During this time, the sun casts a gentle glow that enhances colors and creates a beautiful ambiance. However, even during midday, you can find pockets of excellent light. Look for shaded areas or use natural elements like trees or buildings to diffuse the sunlight. Be mindful of the sun's position and how it affects the shadows on your dish. Experiment with different angles to find the most appealing lighting.
Artificial lights often cast unflattering color casts that can ruin your food photos. The warm tones of incandescent bulbs or the cool tones of fluorescent lights can distort the natural colors of your ingredients, making the dish look unappetizing. Whenever possible, turn off artificial lights and rely solely on natural light. If you must use artificial light, try to match its color temperature to that of natural light. However, the best approach is always to prioritize natural light whenever possible. Even the most sophisticated lighting equipment cannot replicate the beauty and authenticity of natural light.
Reflectors are invaluable tools for bouncing light and filling in shadows. You don't need fancy equipment; simple, everyday items can work wonders. A white napkin, a menu, or even a piece of paper can be used to bounce light onto your subject, ightening up dark areas and creating a more balanced exposure. Position the reflector opposite the light source, angling it to direct the light where it's needed most. Experiment with different angles and distances to achieve the desired effect. With a little practice, you'll be amazed at how much a simple reflector can improve your food photos.
Local Tip: When in a restaurant, don't hesitate to ask for a table near a window. Most restaurants are happy to accommodate your request, especially if you explain that you're a food photographer. A little bit of communication can go a long way in securing the best lighting conditions for your shots.

Composing Mouthwatering Masterpieces
Composition is the art of arranging elements within your frame to create a visually appealing and engaging image. It's about guiding the viewer's eye through the scene and highlighting the most important aspects of your subject. Several compositional techniques can elevate your food photography from simple snapshots to mouthwatering masterpieces.
The rule of thirds is a fundamental principle of composition that involves dividing your frame into nine equal parts using two horizontal and two vertical lines. Place key elements of your subject along these lines or at their intersections to create a more balanced and visually interesting composition. For example, you might position the main dish at one of the intersections, with supporting elements like cutlery or garnishes along the lines. This technique helps to avoid centering your subject, which can often lead to static and uninspired images.
Leading lines are lines that draw the viewer's eye into the scene and towards the main subject. These lines can be created by various elements, such as cutlery, napkins, or even the edge of a table. Use leading lines to guide the viewer's gaze towards the most important part of your dish, creating a sense of depth and perspective. Experiment with different angles and perspectives to find the most effective leading lines.
Negative space, the area around your subject, can be just as important as the subject itself. Use negative space to create a sense of balance and to isolate your subject, drawing attention to its details. A simple, uncluttered background can help to emphasize the textures, colors, and shapes of your dish. Avoid overcrowding your frame with too many elements, as this can distract from the main subject and create a sense of visual chaos. Sometimes, less is more.
The way you arrange food on the plate can significantly impact its visual appeal. Consider height, color contrasts, and garnishes to create a more dynamic and appetizing composition. Stack elements to add height and dimension, use contrasting colors to create visual interest, and add garnishes to enhance the flavors and textures of your dish. For example, a sprinkle of fresh herbs can add a pop of color and aroma to a simple pasta dish. Don't be afraid to experiment with different arrangements until you find one that looks both appealing and delicious.
Props can add context and personality to your food photos. Local silverware, colorful napkins, or even a vintage cookbook can help to tell a story and create a sense of place. Choose props that complement your dish and enhance its overall aesthetic. Avoid using props that are too distracting or that detract from the main subject. The goal is to add subtle details that enhance the visual appeal of your photo without overpowering the dish itself.
Different camera angles can create different effects. An overhead shot is ideal for showcasing the entire dish and its arrangement, while a 45-degree angle provides a more natural perspective, similar to how we see food when we're sitting at a table. A straight-on shot can be effective for highlighting the height and texture of a dish. Experiment with different angles to find the one that best captures the essence of your subject. Don't be afraid to get down low or climb on a chair to get the perfect shot.

Styling Secrets to Savor
Food styling is the art of making food look its absolute best for the camera. It's about enhancing the natural beauty of your ingredients and creating a visually appealing scene that entices the viewer. While some professional food stylists use elaborate techniques, you can achieve stunning results with a few simple styling secrets.
Fresh ingredients are the foundation of beautiful food photography. Choose ingredients that are ripe, viant, and visually appealing. Avoid using wilted vegetables, uised fruits, or anything that looks less than its best. Fresh herbs, colorful spices, and edible flowers can add a pop of color and aroma to your dish. Remember, what looks good on camera often translates to a more delicious-looking meal in real life.
Garnishes are the finishing touches that can elevate your food photos from ordinary to extraordinary. A sprinkle of sea salt, a drizzle of olive oil, or a scattering of toasted nuts can add texture, color, and flavor to your dish. Choose garnishes that complement the flavors of your dish and enhance its overall aesthetic. Avoid using garnishes that are too overpowering or that detract from the main subject. A little bit of garnish can go a long way.
Creating a slightly 'messy' scene can add authenticity and charm to your food photos. A few strategically placed crumbs, a spill of sauce, or a smear of frosting can make your dish look more inviting and approachable. This technique works especially well for rustic or homemade dishes. However, it's important to strike a balance between messy and unappetizing. Avoid creating a scene that looks dirty or unhygienic. The goal is to add a touch of realism without sacrificing visual appeal.
Different types of cuisine require different styling approaches. Rustic Italian dishes, for example, often look best with a simple, unfussy presentation. Think of a hearty pasta dish served in a earthenware bowl, garnished with a sprig of basil and a drizzle of olive oil. Elegant French cuisine, on the other hand, often calls for a more refined and sophisticated presentation. Think of a delicate pastry served on a porcelain plate, garnished with a dusting of powdered sugar and a few fresh berries. Consider the origins and traditions of your dish when styling it for the camera.
Texture and color are essential elements of food styling. Use a variety of textures to create visual interest and to highlight the different components of your dish. Think of the contrast between a smooth sauce and a crunchy topping, or between a soft ead and a crispy crust. Use contrasting colors to create visual impact and to draw attention to the most important elements of your dish. Think of the viant colors of a fresh salad, or the rich hues of a chocolate cake. By paying attention to texture and color, you can create food photos that are both visually appealing and mouthwatering.
Hidden Gem: Visit local markets for unique styling props. Flea markets and antique stores can also be treasure troves for unique silverware, vintage plates, and rustic linens. These items can add character and authenticity to your food photos, helping you to tell a story and create a sense of place.

Gear Up: Essential Travel Photography Equipment
While a professional-grade camera can certainly enhance your food photography, you don't need expensive equipment to capture stunning images. The most important tool is your eye, your ability to see the potential in every dish and to capture its essence through your lens. However, a few essential pieces of equipment can make a significant difference in the quality of your food photos.
Smartphones have become increasingly capable photography tools, and many modern smartphones can capture excellent food photos. Smartphones are lightweight, portable, and easy to use, making them ideal for travel. However, smartphones typically have smaller sensors and less sophisticated lenses than DSLR cameras, which can limit their performance in low-light conditions and their ability to capture fine details. If you're serious about food photography, a DSLR camera is still the best option.
DSLR cameras offer superior image quality, greater control over camera settings, and the ability to use a variety of lenses. However, DSLR cameras are also more expensive, heavier, and more complex to use than smartphones. If you're new to photography, it's worth considering a mirrorless camera, which offers many of the benefits of a DSLR camera in a more compact and user-friendly package.
A versatile lens is essential for travel food photography. A 35mm or 50mm lens is a good choice for capturing a variety of shooting scenarios, from close-up shots of individual dishes to wider shots of entire tables. These lenses are also relatively lightweight and compact, making them ideal for travel. A macro lens can be useful for capturing extreme close-up shots of food, but it's not essential for most food photography. Consider your budget and your shooting style when choosing a lens.
A lightweight tripod can be invaluable for capturing sharp, blur-free images, especially in low-light conditions. A tripod allows you to use slower shutter speeds without risking camera shake, which can result in blurry images. Look for a tripod that is lightweight, compact, and easy to set up. A mini tripod can be a good option for travel, as it's small enough to fit in your camera bag. However, a full-size tripod will provide greater stability and flexibility.
Portable lighting equipment can be useful for supplementing natural light, especially when shooting indoors. A small LED light panel can provide a soft, diffused light that enhances the colors and textures of your dish. Look for a light panel that is lightweight, compact, and easy to adjust. A reflector can also be used to bounce light and fill in shadows. However, it's important to use lighting equipment sparingly, as artificial light can often look unnatural and unflattering.
Understanding camera settings is crucial for capturing well-exposed and visually appealing food photos. Aperture controls the depth of field, the area of the image that is in focus. A wide aperture (e.g., f/2.8) will create a shallow depth of field, blurring the background and drawing attention to the main subject. ISO controls the sensitivity of the camera's sensor to light. A lower ISO (e.g., 100) will result in a cleaner image with less noise, while a higher ISO (e.g., 3200) will allow you to shoot in low-light conditions but may result in a noisier image. Shutter speed controls the amount of time that the camera's shutter is open, exposing the sensor to light. A faster shutter speed (e.g., 1/200 second) will freeze motion, while a slower shutter speed (e.g., 1 second) will allow more light to enter the camera but may result in blurry images if the camera is not stable. Experiment with different camera settings to find the ones that work best for your shooting style and your subject.